


How To Caulk Your Bathroom With Flex Shot
Caulking your bathroom can seem like a daunting task, but Flex Shot is here to help make the job a whole lot easier. This super thick rubber sealant is simple to use, with no need for a caulking gun; just push the nozzle for a perfect bead every time. Many customers have reported great success using Flex Shot in their bathroom, and we know you will too!
Read on to learn why caulking your bathroom is important, what areas should be caulked, and how to use Flex Shot to get the job done right.
Why Is Caulking Important?
Caulking your bathroom is essential in helping to prevent bathroom leaks and water damage. It can also make your bathtub, shower, and areas around your toilet look newer and refreshed.

Using Flex Shot to caulk an RV shower. Photo courtesy of Melanie Snavely.
Over time, traditional caulking products can break down and deteriorate, leaving areas in your bathroom susceptible to costly water damage. Flex Shot can last up to 30 years and will not fade, dry, crack, yellow, or deteriorate, making it an excellent choice for caulking your bathroom!
What Should Be Caulked in a Bathroom?

Using Flex Shot to caulk around a bathtub. Photo by Flex Seal Studios.
Since bathrooms are constantly exposed to moisture, any gaps, cracks, or improperly sealed areas can allow that moisture to seep into walls or flooring. This can create unwanted and often expensive issues, such as mold and wood rot.
To help avoid those issues, it’s recommended to caulk the following areas:
● Bathtubs and showers, where the flooring meets the tub
● Along the seams of a bathtub or shower surround
● Vanities, where the backsplash meets the vanity top
● Around the border of a sink and faucet
● Around showerheads, bathtub spouts, and temperature controls
● Along windowsills
● Around the base of a toilet
How To Use Flex Shot in Your Bathroom
Flex Shot is easy to apply and comes in four different colors: white, black, clear, and almond – ensuring a nice clean finish regardless of your bathroom color scheme. One can of Flex Shot covers anywhere from 40 to 100 linear feet, so you can tackle any bathroom project – large or small!
Ready to get started? Just follow these four easy steps.
1. Remove Existing Caulk
Before applying Flex Shot, you’ll need to make sure that any old caulk is removed. To do this, you can use a caulk remover and razor scraper. Just run the caulk remover along the old caulk to remove it and use a razor scraper to get rid of any remaining bits.
2. Clean the Area
Once all the caulk has been removed, you’ll need to thoroughly clean the area to ensure your surface is free of dirt, mildew, or debris. You can use rubbing alcohol or vinegar to clean, as these will help remove any mold or mildew. After cleaning, grab a drop cloth, and wipe the area completely dry. Flex Shot works on wet surfaces, but it works optimally on dry ones.
Flexpert Tip: If you are having difficulty removing old caulk, Flex Seal Adhesive Remover may be able to help remove any remaining residue.
3. Apply Flex Shot
Flex Shot includes an extension tube. You can screw the tube on the end of the Flex Shot to help you apply it, especially in hard-to-reach areas like corners. Cut the extension tube to your liking: cutting close to the base will dispense a thicker line of Flex Shot, whereas cutting towards the tip would make a thinner line.
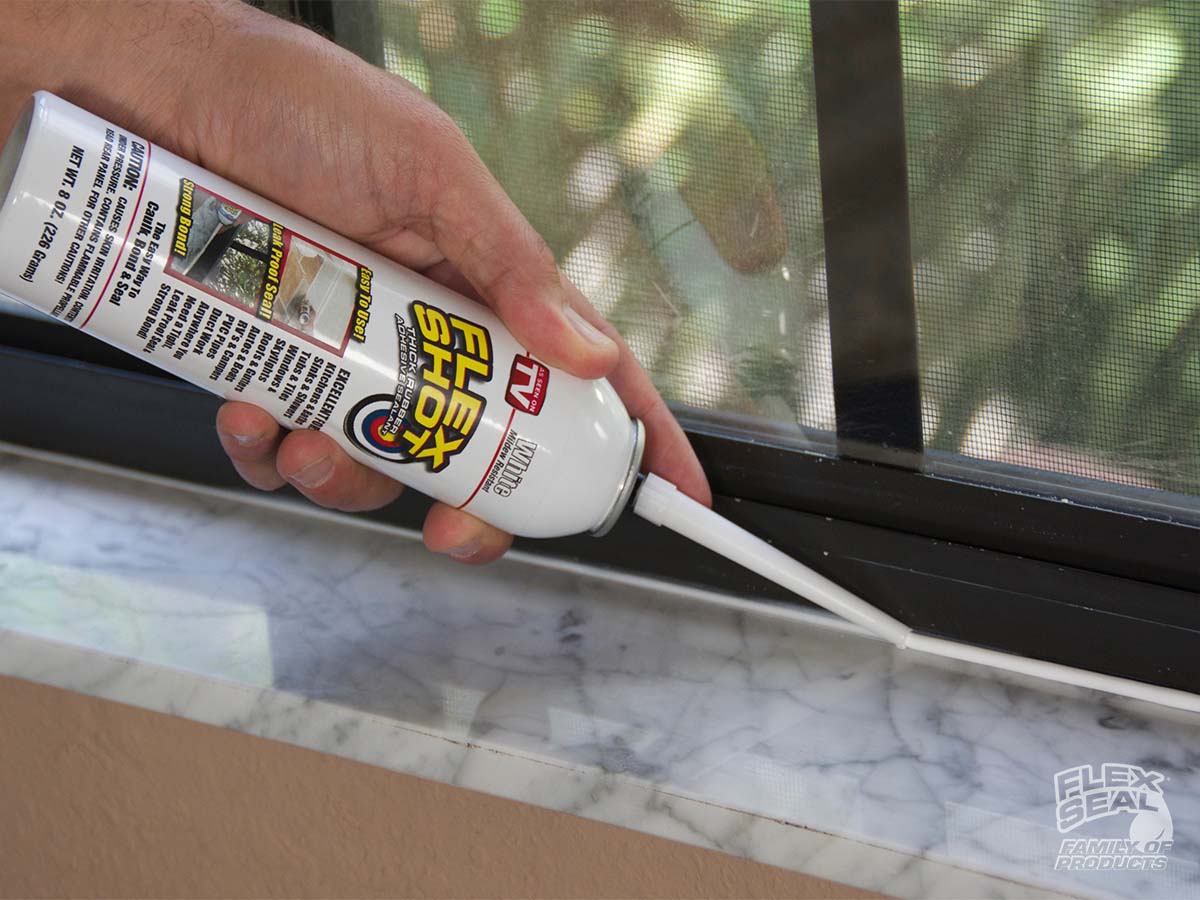
Caulking a window with Flex Shot. Photo by Flex Seal Studios.
Press down on the nozzle and distribute Flex Shot to the areas you are caulking. When you are done, dispense a small amount out of the end of the tube, replace the cap and allow it to dry. This will form a plug and prevent the remaining Flex Shot from drying out. When you want to re-use the Flex Shot, remove the plug before use.
4. Smooth Out the Application Site

Smoothing out a bead of Flex Shot. Photo courtesy of Mr. Build It.
Once you’ve sealed your tub or shower, run your index finger along the caulk to smooth it out, making sure it fills every gap, crack, and hole along the surface. Then, wipe away any excess product. Flex Shot only takes 20 minutes to dry to touch, but allow 48 to 72 hours to cure completely.
Bathroom caulking doesn’t have to be difficult. With proper knowledge and a little elbow grease, areas in your bathroom can have a watertight seal for years to come, thanks to Flex Shot!


