How To Make DIY Textured Wall Art
“How To Make DIY Textured Wall Art” was written by a paid contributor. All photos by Stephen Quinn.
Textural artist Stephen Quinn has been creating beautiful works of art for over a decade. Recently, he put Flex Paste to the test by creating some one-of-a-kind textured art pieces, and the results are flextastic!
Flex Paste is great for textured art because it’s thick, durable, and fast-drying. It successfully stacks, making it easier than ever to add three-dimensional textures and details to your DIY textured wall art. Keep scrolling to see Stephen’s mastery and learn how to make textured art for your own space!

Materials
● 3 Flex Paste 48oz containers, white
● 36”x60” wood panel
● Acrylic paint
● Painters tape
● Glaze
● Paint rollers with different textures
● Textured rollers
● Putty knives
● Paintbrushes
Note: Before using Flex Seal products, read all directions and take proper safety precautions, such as being in a well-ventilated area and wearing protective gear while applying.
Steps
1. Prep Workspace and Gather Materials

For this project, you’ll want to organize a workspace that can remain uninterrupted for several days.
Start by laying the canvas flat on your work surface instead of on an easel. Keeping your board horizontal makes it easier to sculpt heavy or thick materials.
Stephen uses a 36”x 60” wood panel as his canvas of choice, but plywood would also work well. If you’re feeling resourceful, a reclaimed wood door could also make a great canvas for your DIY textured wall art project!
2. Open Flex Paste

Open your tub of Flex Paste. When you remove the product lid, notice the silica gel packet and protective foil seal within the lid. Don’t throw these away, as you’ll need them later to help preserve the Flex Paste.
Flex Paste can begin setting in as little as 15 minutes, so you’ll want to cover the product with the foil seal whenever you aren’t dispensing it.
Flexpert Tip: If you still have product left once you’re finished with your project, replace the foil seal, press out any air, and add the silica gel packet on top before closing the lid. By eliminating air and moisture in the Flex Paste container, you will extend its life and can plan to use it for other projects.
3. Apply Flex Paste to Canvas

Begin transferring Flex Paste from the container directly onto your canvas. Use putty knives, spatulas, spoons, or any other scoops of your choice. Flex Paste does not need to be mixed, but you should avoid scooping too deep, which can create air pockets in the product.
Creating substantial texture comes by applying Flex Paste in layers. You can add more dimension and texture once the first layer dries.

As a textural substance, you’ll find that Flex Paste is thicker than traditional paints, stuccos, caulks, and compounds. It can be applied to the canvas thick and will begin to dry quickly. And since it’s a rubberized paste, it is less likely to crack as it dries. Unlike other materials, Flex Paste’s quality makes it extremely easy to create dimensional textured art.

Flexpert Tip: You don’t need to use the same tools as Stephen to achieve a great result with your DIY textured wall art. There are countless ways to achieve interesting textures with tools and materials around your home.
4. Allow Flex Paste to Dry

Allow your first layer of textured Flex Paste to dry on the canvas overnight. Thinner applications may cure in less than a day, but a full 24-48 hours is best for heavier areas.
5. Add More Layers
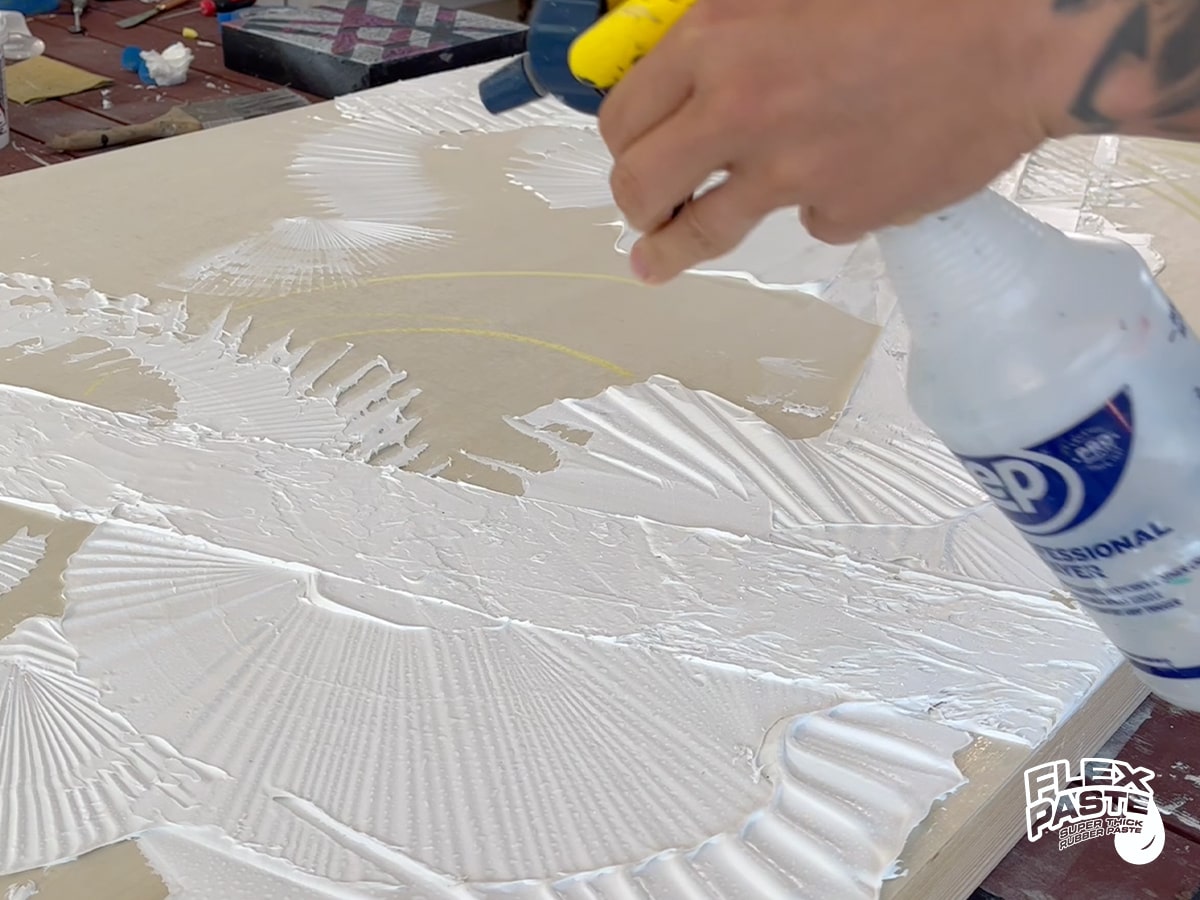
There are no rules to how many layers of Flex Paste you can apply to your DIY textured wall art, so follow your artistic instincts! Use finer tools on the second, third, or fourth layers, and enjoy the sculpting process as you develop unique details and textures.
In addition to using tools, you can use strips of painter's tape or other blocks to create patterns on your canvas, just be sure to remove the tape and blocks before the Flex Paste dries.

Stephen recommends exploring color between layers once the Paste is dry. Adding a layer of diluted paint atop the textures can help guide your direction and highlight the design you’ve already built. You can use a traditional paintbrush to apply color, or as Stephen demonstrates, simply mist your piece with water and apply the paint by hand with a glove.

Spreading the paint generously on a dampened surface helps reveal subtle details to inform the next layers of Flex Paste. Use it as an opportunity to identify patterns and elevations you like or to repair and rework areas that don’t look exactly as you thought they would.
6. Add Color to Your Canvas

For this step, you may want to stand your artwork upright against a wall or on an easel. Select your paint colors and let the textures be your inspiration for color and design. You could even add drips of paint to your finished piece. Let the creativity flow!

Stephen likes to use high contrast, energetic markings as he builds paint layers. His goal is to cover the surface but take it one layer at a time and let the textures reveal and develop. He might paint the entire surface one color but then go back and add other colors to highlight the textured art details as he goes.


Allow the canvas to dry between colors, and don’t be afraid to go back and add more colors or detail as you witness the design’s evolution.
7. Add a Finishing Glaze (Optional)

Once the paint is dry, you can add a clear finishing glaze to complete the art piece, which helps bring out additional detail and depth. Most glazes can be painted on top of the finished textures.

We hope Stephen’s artwork inspires you to grab some Flex Paste and create your own DIY textured wall art! To learn more about Stephen and to view his online art gallery, please visit www.stephenquinnart.com.


