


3 Simple Holiday Decor Repairs
"3 Simple Holiday Decor Repairs" was written by a paid contributor. All photos by Briana Colangelo.
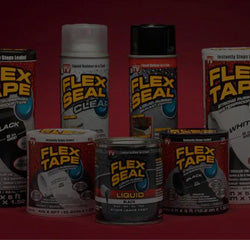
The holidays are here and with that comes lots of decorations! Some new, some old, and some that need to be repaired. Every year items get packed away and not always with the best of care. If you find yourself with broken holiday decor items, don't worry. With the help of Flex Seal products, damaged decorations and sentimental keepsakes can be repaired so they can last for years to come.
Read on for 3 quick holiday decor repairs made possible by the Flex Seal Family of Products.
How To Repair a Popped Inflatable

Materials
- Flex Seal Inflatable Patch & Repair Kit
- Paper towels/rag
Steps
1. Clean and Prep

Before applying a patch to your inflatable, you’ll want to clean the application area (especially if your inflatable has been outside). Use a rag or paper towel to clean the area of any dirt or debris. Be sure that the area is completely dry before moving on to the next step.
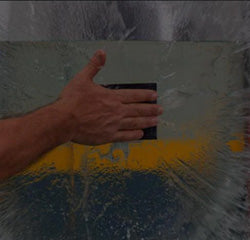
2. Patch

Now that the area is clean and dry, carefully identify the leaky area(s). My Frosty the Snowman was always deflating and I discovered there was a hole in the bottom of the inflatable.

Be sure the patch covers beyond the tear or hole to prevent any further damage. My hole was about the size of a quarter, so there's a good amount of patch surrounding the tear.
Since the inflatable will be outside in the harsh New England winter, I decided to use one entire patch for the hole. Simply place the patch on top of the hole and smooth out any wrinkles until all air pockets have been removed. Now all that's left to do is to plug in your inflatable and watch it come back to life!

How To Fix a Broken Ornament

Materials
- Flex Super Glue (any size)
- Paper towels
- Gloves
- Tape (depending on repair)
Note: Before using Flex Super Glue, please read all directions carefully and wear protective gear such as gloves when applying to avoid getting Flex Super Glue on your hands. When using Flex Super Glue Gel, shake the gel down towards the applicator tip before applying.
Steps
1. Clean and Prep

First, wipe down the area that needs to be fixed to ensure Flex Super Glue is applied to a clean surface. I used some water and a paper towel.
2. Apply Flex Super Glue

Remove the Flex Super Glue from the package and unscrew the cap. Take your broken ornament and place a drop on the broken area. If the surface is large, you can apply multiple drops. My ornament was broken in two spots, so I started out by repairing the neck of the goose. After applying Flex Super Glue, I held the pieces in place for 45 seconds to allow the glue to set.
3.Tape (optional)

The neck area that needed to be repaired had a tension spring inside, so I needed to tape the spot where the Flex Super Glue was applied to give it a stronger hold while it cured. I used electrical tape because it was easy to stretch without breaking.
Flexpert Tip: Flex Super Glue will set in about 45 seconds, but can take up to 24 hours to fully cure.
4. Apply Additional Glue if Needed

After I allowed the first spot to cure, I started repairing the next area. Repeat the same process. Add a drop of Flex Super Glue to the broken area. Hold for 30-45 seconds before letting go.

It can be hard to let go of sentimental items so I'm happy I was able to repair this ornament with the help of Flex Super Glue. Now we'll be able to hang this on our tree for many years to come.
Fix Holiday Table Decor

Materials
- Flex Super Glue (any size)
- Paper towels
- Gloves
Steps
1. Clean and Prep

As always, make sure the area you are applying Flex Super Glue to is clean and free of dust, dirt and oil. I used a paper towel and water to wipe down the horse.
2. Apply Flex Super Glue

One of the most popular holiday decor items are table displays. They also happen to be one of the most commonly broken items. This is where Flex Super Glue comes to the rescue. We’ve had this Christmas unicorn music box for quite some time, and the leg has been broken for as long as I can remember. It’s one of those things that I kept putting off fixing, so I'm glad to finally be tackling this little repair.
All I did was add a drop of Flex Super Glue to the broken piece and apply even pressure for about 45 seconds.
Flexpert Tip: Remember, Flex Super Glue will set in about an hour, but it can take up to 24 hours to cure.

Well, that's it! I am so pleased this ceramic horse is finally fixed! Flex Seal products worked perfectly for these holiday repairs and I'm so glad to be able to repair instead of replace. Happy Holidays and Flex on!
By Briana Colangelo
Bri is a self-taught DIYer who's had a passion for DIY projects since a young age. After buying a 1958 cape home, she has been slowly transforming each room in her house. Bri also shares her designs and DIY projects as a content creator on Instagram and TikTok @d.i.y.bri.
Related Articles


CRAFTS & DIY PROJECTS


- Choosing a selection results in a full page refresh.