


How To Make a DIY Fishing Rod Holder
This “DIY Fishing Rod Holder” blog was written by a paid contributor. All photos taken by Flukemaster.
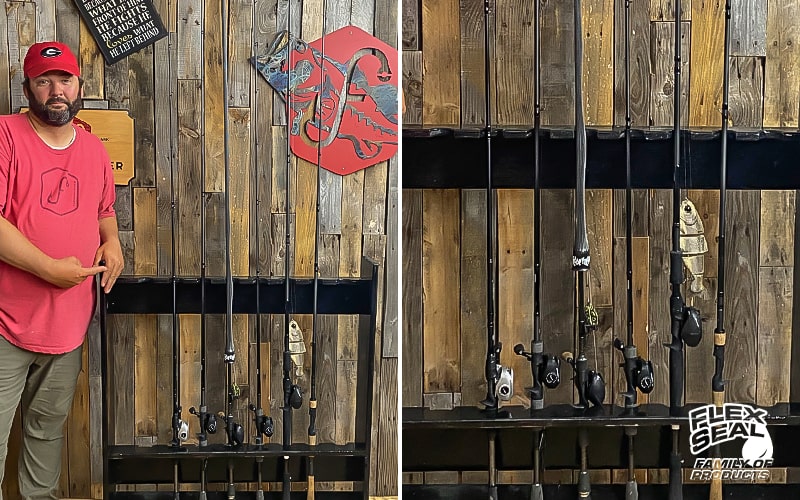
Fishing enthusiasts rarely limit themselves to owning just one fishing rod. As your impressive fishing rod collection grows, you’ll need to find a safe place to store them. DIYer and fisherman, Flukemaster, shows you how to do just that with his new DIY fishing rod holder.
If you’re looking for DIY fishing rod storage ideas, this step-by-step tutorial will give you the inspiration you need. Keep reading to learn how to make a DIY fishing rod holder.

Materials
● 1 Flex Glue 4oz squeeze tube, clear
● 1 Flex Seal Liquid quart, black
● (2) 48” 1x8 boards
● (4) 36” 1x6 boards
● (2) 9-½” 1x3 boards
● Drill
● Miter saw
● Table saw
● Forstner bit
● Pocket hole jig
● 2” hole saw
● Paint brushes
● Router (optional)
● Sandpaper
● Clamps
● Carpenter square
● Measuring tape
● Pencil
Steps
Note: Use caution when working with power tools and always follow manufacturer’s instructions. Before using Flex Seal products, read all directions and take proper safety precautions, such as being in a well-ventilated area and wearing protective gear while applying.
1. Carefully Measure Wood

Measure a line lengthwise down the center of the 1x8 boards. Make a pencil mark every two inches along the line to begin to mark for the holes. At every other pencil marking, place an “X” to mark the spot you’re going to drill. Each hole will be 4” apart on center. You should have enough length for eight holes.
2. Drill Holes

Drill holes using a forstner bit and the drill. Apply pressure downward on the drill to create eight holes directly through the board.
3. Cut Board in Half
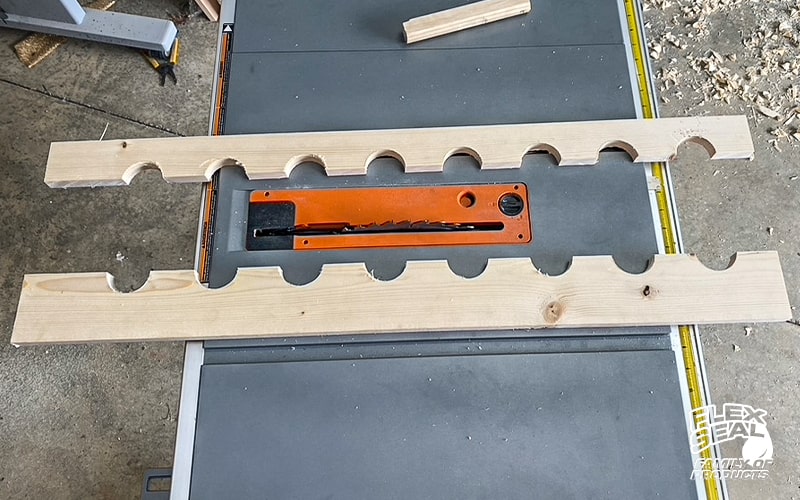
Use a table saw to cut along the measured line to cut the circles you drilled in half. You’ll be left with two boards with evenly cut half circles. This approach prevents you from having to cut half circles.
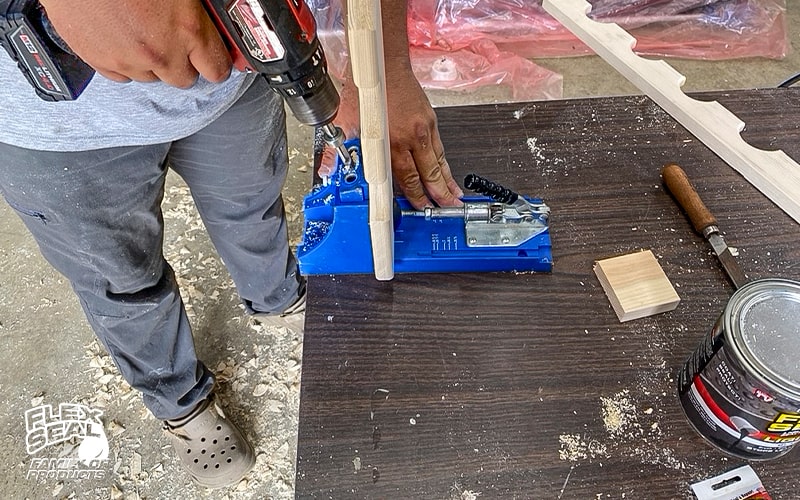
4. Sand the Boards and Create Pocket Holes

Use a router or sandpaper to clean the edges and smooth any splinters. Next, use a pocket hole jig to create pocket holes for assembly.
5. Assemble Backboards With Flex Glue

Apply Flex Glue just like you would use wood glue. It will create an instant bond and hold the wood in place. Insert a screw into the predrilled hole to reinforce the connection, using clamps to secure its placement so that it remains in position.

6. Attach Wood Board

Attach a board at the front edge at an angle. The angle will force the rods forwards to sit snug and secure in the holder.
7. Attach Rod Holders
Position the half-circle boards into place on the top and bottom of the rod holder. You’ll install one at the top of the holder. To position the bottom board, measure up 11” from the floor and level the second board at that spot. Doing so will help keep each rod positioned onto the lower board.
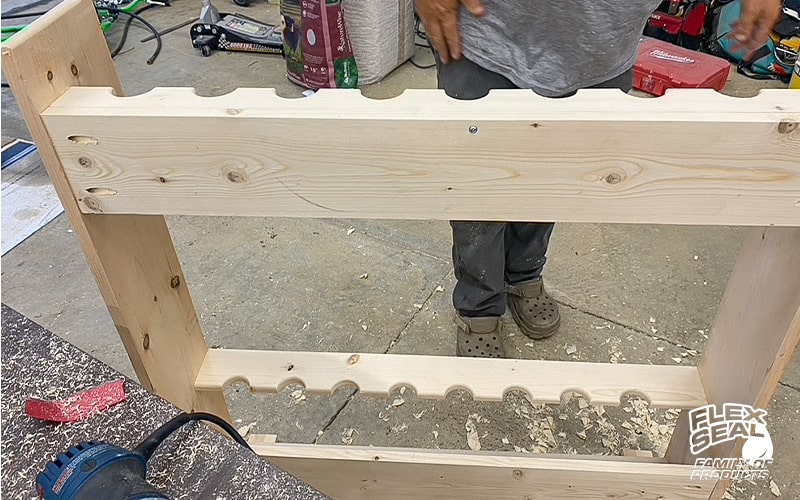
Next, use Flex Glue to attach the board at the top of the fishing rod holder in reverse, so the rods will lean into the top piece but be angled and anchored in position by the half-circles at the bottom of the holder. Use screws to reinforce it into position.
8. Add Wooden Feet and Sand Again

Put two wooden feet onto the rod storage for stabilization. Place the unit onto the table and use the pocket hole jig to attach the 9-1/2” boards to the base of the piece. Once attached, sand down the surface one more time before moving on to the next step.
9. Apply Flex Seal Liquid

Paint the product on with a paint brush and smooth it out over all edges. Flex Seal Liquid goes on thick and self-levels as it’s applied. It’s also UV-resistant and waterproof, which makes it great for any outdoor products that need to last a long time.
Flexpert Tip: Work from the bottom up by standing the fishing rod holder upright. Paint the feet first before applying more paint to the upper boards.
Within 24-48 hours, the Flex Seal Liquid transforms into a rubberized coating that will help protect the wood from moisture. The finished product is a DIY fishing rod holder that is prepared to withstand the elements and keep your fishing rods organized and safe all year long.


