


DIY Shoe Repair: How To Use Flex Glue To Repair Shoes
This “How to Use Flex Glue to Repair Shoes” blog was written by a paid contributor. All photos were taken by Flex Seal Studios.
The Flex Seal Family of Products isn’t just for stopping leaks. Our versatile line of sealants and adhesives can help repair all kinds of things – including shoe soles! If your favorite pair of shoes have seen better days, don’t be so quick to throw them away. Instead, let Flex Glue save the day!
This super-strong, waterproof glue adheres to a variety of surfaces, making it an excellent shoe sole glue. Flex Glue can extend the life of your shoes in just a few steps, with minimal materials needed. Read on to learn how to use Flex Glue to repair shoes.
Materials
● Scissors
Steps
1. Inspect and Clean Shoe Sole

Broken shoe sole (before cleaning). Photo by Flex Seal Studios
First, inspect your shoe and clean out any dirt or debris that may be present. If you notice caked-on dirt or old shoe sole glue, gently buff the area down using sandpaper. You can also do this if the sole or bottom of the shoe is very smooth. Adding a bit of texture to the sole will help with adhesion.

Shoe sole after cleaning. Photo by Flex Seal Studios
2. Place a Rag Inside the Shoe

A shoe with a rag placed inside. Photo by Flex Seal Studios
Lightly pack a rag or a few paper towels inside the shoe, so it feels firm but not overly stuffed. Filling the shoe helps to hold its shape during the curing process once you apply the Flex Glue.
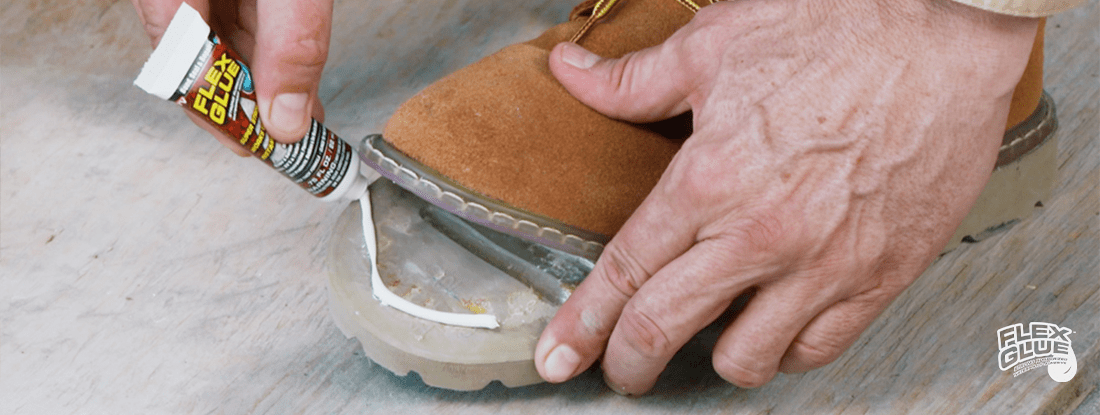
3. Apply Flex Glue

Flex Glue applied to a broken shoe sole. Photo by Flex Seal Studios
Flex Glue makes a great shoe sole glue because it bonds seamlessly, creating a strong hold between the shoe sole and the bottom of the shoe casing. Use your scissors to snip the nozzle tip off the Flex Glue. Then evenly apply Flex Glue to the shoe sole by covering as much of the surface area of the exposed sole as possible.
Flexpert Tip: Start applying Flex Glue where the sole has separated from the shoe, then work outward towards the toe. Don’t add too much product near the outer edge of the sole to avoid excess glue squeeze-out once you press the sole down.
4. Close and Secure Shoe Sole

A clamp can help secure your shoe while drying. Photo by Flex Seal Studios
Once all the glue is evenly applied, carefully press the two sides of the shoe together. Massage the shoe using slight pressure to smooth out the Flex Glue.
Flexpert Tip: For best results, do not reopen the sole to rearrange it once you press it down. Confidence is key!
When you’re confident the glue is evenly distributed between the shoe casing and sole, hold the shoe closed with your hands for at least 20 to 30 seconds to activate Flex Glue’s instant grab. Then, find a weighted object, such as a dumbbell, or use a clamp to ensure the shoe will remain closed without deforming it.
Flexpert Tip: If any residual Flex Glue gets squeezed out onto the shoe while pressing closed, simply wipe it away within 10 minutes.
5. Allow Shoe Sole Glue To Dry
Flex Glue will start to dry within 10 to 20 minutes and be fully dry to the touch in about an hour. However, it takes 24 to 48 hours to cure fully. During that time, you should leave the shoe weighted or clamped to allow the glue time to set before you wear the shoe again.
Now it’s time to kick up your heels and celebrate your newly repaired shoe soles! A well-loved pair of shoes deserves a long life, and Flex Glue helps make that possible.


