


How To Make a Duct Tape Wallet
"How To Make a Duct Tape Wallet" was written by a paid contributor. All photos by Melanie Snavely.
As a kid who grew up in the 90s and 2000s, I remember duct tape wallets being all the rage. Although I never got to make one when I was younger, the release of Flex Super Wide Duct Tape has inspired me to make one now! This was the perfect duct tape craft to unleash the 90s kid that lives in my soul, and I had a blast putting it together. Keep reading to learn how to make the ultimate duct tape wallet out of our new Flex Duct Tape.

Materials
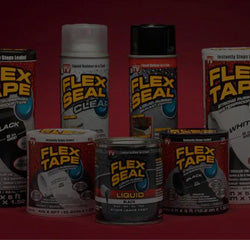
● 1 Flex Super Wide Duct Tape 4.6-inch-wide roll, black
● Scissors
● Ruler
Flexpert Tip: I chose to make a black wallet, but if you'd prefer a different look, Flex Super Wide Duct Tape is also available in white and gray. If you want to personalize your wallet, you can decorate it with stickers or decals.
Steps
1. Create the Main Wallet Fabric

Start by measuring out two sections of 9-inch duct tape. Then stick the two sections together, sticky sides touching. Smooth out any air bubbles as you go along. Because Flex Super Wide Duct tape is 144% wider than standard duct tape*, you will only need these two main sections for your wallet instead of cutting additional strips to adhere together, as you would with other duct tape.
2. Cut Strips for the Outer Edge of Duct Tape Wallet

First, make a third section of 9-inch duct tape. Then turn that vertically and tear two 2-inch strips of duct tape. I went with two inches because I wanted my wallet just slightly taller so that it would hold cash perfectly. You can do 1" strips if you prefer it flush with the edge of the base fabric you created.
Flexpert Tip:The amazing thing about Flex Super Wide Duct tape is that even though it is super strong, it can still be torn by hand, both vertically and horizontally.
3. Fold Strips Over Top and Bottom Ends to Make a Smooth Edge

Take one of the two strips you just tore and stick it lengthwise across the top edge of the main fabric base. Then fold it over so it adheres to the opposite side, leaving a little space above the fabric edge; this will give you an extra inch of height for your duct tape wallet. Use the second strip to do the same thing with the bottom edge of the main fabric base.
4. Trim the Side Edges of Wallet Fabric (8.5")

Use scissors to cut the side edges of the wallet. Make sure you don't cut it shorter than 8.5 inches, or it won't be long enough to hold your bills. You now have the main base of your duct tape wallet fabric!
5. Tear a 1-inch Strip of Tape Vertically and Cut it in Two

Now you’ll begin the process of creating the billfold. Since we are using super wide duct tape, you should have leftover tape from the last vertical strips you tore. Tear a one-inch strip of tape vertically, then cut that strip into two 4-inch horizontal strips.
6. Fold Main Base of Wallet Fabric in Half
To create the main billfold, take your large base of duct tape wallet fabric and fold it in half, top edge to bottom edge.
7. Secure Side Edges With 4-inch Strips of Tape

Secure the billfold's side edges using the two four-inch strips of duct tape. First, adhere one of the strips to the left edge, then fold it over to the opposite side of the wallet. Do the same thing to the right edge with the second 4" strip.
8. Create a Card Pocket for Your Duct Tape Wallet

Every good wallet needs a snug space for holding cards. First, measure a 5-inch section of Flex Super Wide Duct Tape and then fold it in half, top to bottom, so that the sticky sides adhere together. Then trim the side edges off so your pocket fabric is 4" across.

With the wallet unfolded, use three small strips of duct tape to adhere the pocket to one side of the inside of the duct tape wallet. Place one strip along the bottom of the pocket and fold it over to adhere to the main billfold. Then do the same with the outside and inside edges of the pocket.

If you want additional pockets in your wallet, you can repeat this process to add another one to the other side of the wallet or create a smaller section of pocket fabric and adhere it on top of the pocket you just created.
All that's left to do is fold the wallet in half lengthwise, and it’s ready to go. Congratulations, you just made your own duct tape wallet! Use the main billfold for cash and paper, then slip your ID and any needed cards into any of the pockets you added.

I really enjoyed bringing out my 90s side for this fun duct tape craft. Since Flex Duct Tape is so wide, it saved me a lot of additional cutting, tearing, or wasted tape. If you want to make the ultimate duct tape wallet, Flex Super Wide Duct Tape is the way to go!
*The 4.6-inch Flex Super Wide Duct Tape roll used for this craft is 144% wider than standard 1.88-inch duct tape. Our 7.5-inch roll is 300% wider than standard 1.88-inch duct tape.
By Melanie Snavely
Melanie is the writer and content producer for Life’s Sweet Journey. Her husband, Andrew, is along for the ride and makes cameos when things get technical. They have been across the country and back again, living in their 34ft Keystone Cougar for the past 3+ years. They share their travels, love for local restaurants and breweries, and any RV mishaps that happen along the way. You can find them on YouTube and Instagram at Life’s Sweet Journey.
Related Articles


CRAFTS & DIY PROJECTS


- Choosing a selection results in a full page refresh.